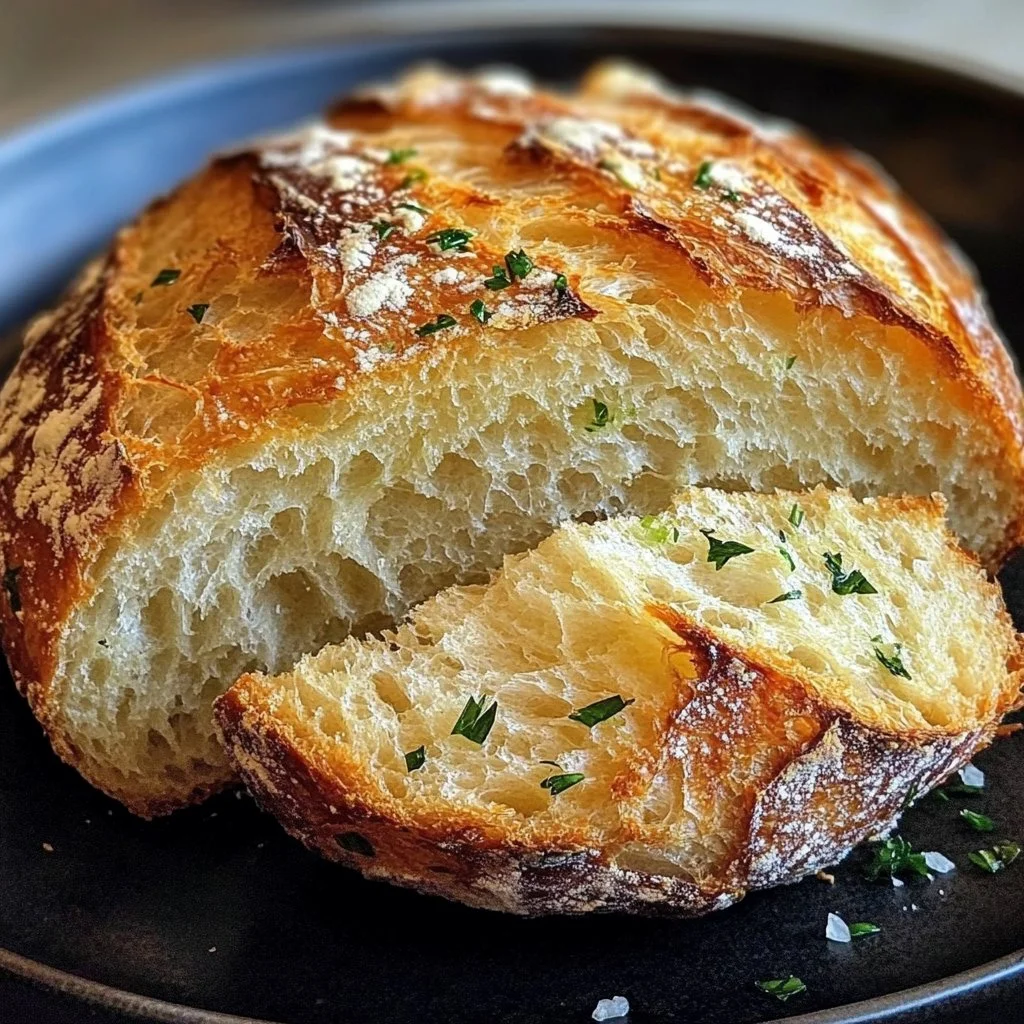
Garlic Swirl Rolls
Garlic Swirl Rolls are the ultimate indulgence, marrying the warm, comforting embrace of fresh dough with the savory punch of garlic and herbs. Each bite melts away, transporting you back to cozy family kitchens or bustling gatherings, where the aroma of freshly baked bread fills the air. Imagine tearing into a soft, fluffy roll, the buttery garlic filling oozing out, and the scent wrapping around you like a warm hug. This recipe is not just worth making; it’s a culinary experience laden with nostalgia, perfect for any occasion—be it a weeknight dinner, a festive gathering, or simply a cozy night in. Plus, they’re incredibly quick to make, making them a delightful weekend project or a last-minute addition to meals. With these Garlic Swirl Rolls, you’ll have everyone asking for seconds!
Are You Ready to Satisfy Your Cravings?
Is there anything more enticing than the aroma of freshly baked garlic rolls wafting through your home? Imagine the cozy feeling of pulling a tray out of the oven, the golden tops glistening, and the promise of warm, gooey goodness wrapped inside each spiral. Have you ever had that moment when you take a bite, and it’s like a flavor explosion? The perfect balance of savory and buttery—it’s a hug in food form. Are you ready to indulge in these delicious Garlic Swirl Rolls?
Why You’ll Love This Recipe
These Garlic Swirl Rolls are more than just delicious; they are:
- Easy to Make: With just a few simple steps, you’ll be on your way to baking heaven.
- Crowd-Pleaser: Serve these at gatherings or weekday dinners, and they will disappear in no time!
- Minimal Ingredients: You probably have most of the ingredients right in your pantry, making them a go-to choice for spontaneous cravings.
- Versatile: Pair them with soups, salads, or enjoy them solo; they always hit the spot.
- Kid-Friendly: Even the pickiest of eaters will fall in love with these delightful rolls.
Ingredients
To create these irresistible Garlic Swirl Rolls, you’ll need:
-
4 cups all-purpose flour: The basis for a fluffy and soft dough.
-
2 1/4 teaspoons active dry yeast: This little magic maker gives your rolls that light, airy texture.
-
1 cup warm milk: Helps create a soft, tender crumb and activates the yeast.
-
1/4 cup granulated sugar: Just a touch for sweetness and to boost yeast activation.
-
1/2 cup unsalted butter, melted: Adds richness while keeping the rolls moist.
-
2 large eggs: For structure and a touch of decadence.
-
1 teaspoon salt: Balances flavors and enhances the savory notes.
-
1/2 cup unsalted butter, softened: This will be used in the filling for that luscious garlic richness.
-
6 cloves garlic, minced: The star of the filling—bold and aromatic.
-
2 tablespoons fresh parsley, chopped: For that fresh herbal note that brightens the rolls.
-
1/2 teaspoon salt: Just a pinch to season the filling.
-
1/4 teaspoon black pepper: Adds a subtle kick.
-
2 tablespoons grated Parmesan cheese (optional): An added layer of flavor, perfect for cheese lovers.
-
Extra parsley for garnish: For a pop of color that draws the eye.
Timing
In just under two hours, you can create these dreamy Garlic Swirl Rolls. The best part? Most of that time is hands-off, allowing the dough to rise and develop flavor. If you’re seeking a quick indulgence, this recipe delivers, but it also allows leisurely preparation if you want to savor the process.
Step-by-Step
-
Prepare the Dough: In a large mixing bowl, whisk together warm milk and sugar. Sprinkle the yeast on top and let it sit for 5-10 minutes until frothy. The anticipation builds as the yeast activates! Once activated, add the melted butter, eggs, and salt. Gradually mix in the flour, one cup at a time, until a soft dough forms. Knead the dough on a floured surface for 5-7 minutes until smooth and elastic. Place the dough in a greased bowl, cover it, and let it rise for about 1-1.5 hours or until it doubles in size.
-
Prepare the Filling: In a small bowl, blend the softened butter with minced garlic, parsley, salt, and pepper until well combined. The aroma will instantly transport you to a blissful state!
-
Shape the Rolls: Gently punch down the risen dough and roll it into a 12×18 inch rectangle. Spread the garlic butter mixture evenly over the dough. Now comes the fun part—roll it tightly from the long edge and slice it into 12 equal pieces.
-
Second Rise: Arrange the rolls cut side up in a greased baking dish. Cover and let them rise for another 30-45 minutes until puffy. The rolls will start to look like clouds anticipating their golden destiny.
-
Bake: Preheat the oven to 350°F (175°C). If you opted for it, sprinkle the rolls with Parmesan cheese and bake for 20-25 minutes until golden brown. The sight of your rolls emerging from the oven will make your heart race. Let them cool slightly before serving. Enjoy warm, and watch as everyone gathers around!
Nutritional Information
A single serving of these Garlic Swirl Rolls has approximately 180 calories. While they are an indulgent treat, think of them as a delightful splash of comfort in your week—remember, a little indulgence every now and then is essential for the soul!
Healthier Alternatives
For those looking to lighten things up, consider using:
-
Whole Wheat Flour: Swap a portion (or all) for whole wheat flour for added fibers.
-
Dairy-Free Options: Replace milk with almond or oat milk and use coconut oil instead of butter in the dough and filling.
-
Lower Sugar: Reduce the granulated sugar by half without sacrificing flavor.
These swaps still deliver delicious Garlic Swirl Rolls that are slightly healthier without losing that crave-worthy charm.
Serving Suggestions
Enjoy these Garlic Swirl Rolls straight out of the oven, warm and fragrant. They pair wonderfully with:
-
Soups: A steaming bowl of tomato soup or a hearty chicken broth.
-
Salads: Fresh greens tossed with vinaigrette for a balanced meal.
-
Dips: Pair them with creamy cheese or herb-infused dips for an appetizer.
These rolls can truly stand alone as an enticing snack, or be the star of any meal.
Common Mistakes
Avoid these pitfalls to ensure your Garlic Swirl Rolls are perfect:
-
Overbaking: Keep an eye on the rolls during baking; they should be golden brown but not too dark.
-
Texture Issues: Ensure your dough rises adequately to achieve that light, fluffy texture.
-
Messes: Always knead on a floured surface to minimize stickiness and make cleanup easier.
Storing Tips
These Garlic Swirl Rolls are best enjoyed fresh but can be stored if you have leftovers:
-
Freezing Options: If you want to prep in advance, freeze the rolls after shaping. Simply cover them tightly and freeze for up to 3 months. When ready to bake, let them thaw and rise before baking as usual.
-
Reheating Instructions: To reheat, wrap in foil and place in a preheated oven at 350°F for about 10 minutes to revive that fresh-baked texture.
Tempted to Bake These Right Away?
These Garlic Swirl Rolls are simply irresistible; their fragrant, buttery goodness will have you craving a fresh batch almost as soon as they’re gone. Their nostalgic charm and ease of preparation make them a must-try for any home baker. So, gather your ingredients, harness the aroma of comforting garlic, and let’s bring these delightful rolls to life in your kitchen!
FAQs
-
Can I make the dough ahead of time?
Yes! You can prepare the dough up to the first rise, then refrigerate it overnight. Let it come to room temperature before shaping. -
What can I use if I don’t have fresh garlic?
You can substitute garlic powder; use about 1 teaspoon for the filling. -
How do I know when the rolls are fully baked?
The rolls should be golden brown on top. You can also tap the bottom; it should sound hollow when fully baked. -
Can I skip the second rise?
While the second rise helps achieve fluffiness, if you’re short on time, it’s possible to bake them after the first rise. Just be prepared for denser rolls. -
What’s the best way to store these rolls?
Keep them in an airtight container at room temperature for up to 3 days, or freeze them for longer storage.
Let the sweet baking adventure begin! Garlic Swirl Rolls await you.
Print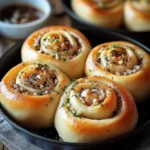
Garlic Swirl Rolls
- Total Time: 120 minutes
- Yield: 12 rolls 1x
- Diet: Vegetarian
Description
Irresistibly soft and fluffy rolls filled with buttery garlic goodness, perfect for any occasion.
Ingredients
- 4 cups all-purpose flour
- 2 1/4 teaspoons active dry yeast
- 1 cup warm milk
- 1/4 cup granulated sugar
- 1/2 cup unsalted butter, melted
- 2 large eggs
- 1 teaspoon salt
- 1/2 cup unsalted butter, softened
- 6 cloves garlic, minced
- 2 tablespoons fresh parsley, chopped
- 1/2 teaspoon salt
- 1/4 teaspoon black pepper
- 2 tablespoons grated Parmesan cheese (optional)
- Extra parsley for garnish
Instructions
- In a large mixing bowl, whisk together warm milk and sugar. Sprinkle the yeast on top and let it sit for 5-10 minutes until frothy.
- Add the melted butter, eggs, and salt. Gradually mix in the flour, one cup at a time, until a soft dough forms.
- Knead the dough on a floured surface for 5-7 minutes until smooth and elastic.
- Place the dough in a greased bowl, cover it, and let it rise for about 1-1.5 hours or until it doubles in size.
- In a small bowl, blend the softened butter with minced garlic, parsley, salt, and pepper until well combined.
- Gently punch down the risen dough and roll it into a 12×18 inch rectangle. Spread the garlic butter mixture evenly over the dough.
- Roll the dough tightly from the long edge and slice it into 12 equal pieces.
- Arrange the rolls cut side up in a greased baking dish. Cover and let them rise for another 30-45 minutes until puffy.
- Preheat the oven to 350°F (175°C). If using, sprinkle the rolls with Parmesan cheese and bake for 20-25 minutes until golden brown.
- Let them cool slightly before serving. Enjoy warm!
Notes
These rolls are best enjoyed fresh, but can be frozen after shaping for later use. Reheat in the oven for best texture.
- Prep Time: 30 minutes
- Cook Time: 25 minutes
- Category: Side Dish
- Method: Baking
- Cuisine: American
Nutrition
- Serving Size: 1 roll
- Calories: 180
- Sugar: 5g
- Sodium: 400mg
- Fat: 10g
- Saturated Fat: 6g
- Unsaturated Fat: 4g
- Trans Fat: 0g
- Carbohydrates: 20g
- Fiber: 1g
- Protein: 4g
- Cholesterol: 30mg