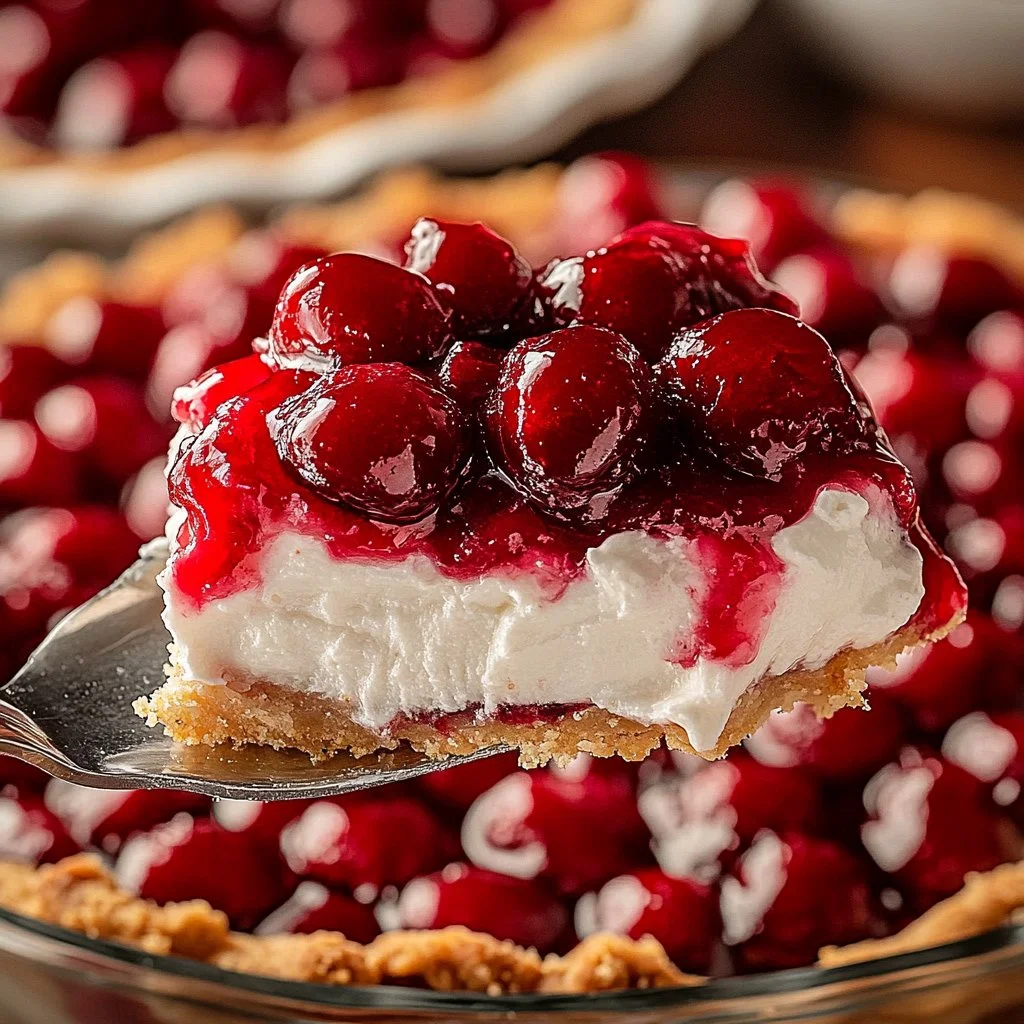
Vintage Cherries In the Snow
The Vintage Cherries In the Snow recipe is a delightful frozen dessert that perfectly captures the warmth of nostalgia while bringing a cool, creamy treat to your dining table. This recipe, with its step-by-step instructions, invites you to embark on a culinary journey that combines the richness of cream cheese, the crunchy texture of graham crackers, and the vibrant allure of cherry pie filling. The moment you take your first bite, you’ll be enveloped in a symphony of flavors, textures, and comforting memories, making it an ideal dessert for any occasion.
History / Fun Fact
Vintage Cherries In the Snow dates back several decades, often gracing tables during family gatherings and special celebrations. This layered dessert has roots in the American culinary landscape, particularly in the Midwest, where it is celebrated for its simplicity and elegance. There’s an endearing story of a family who would invite their neighbors over for summer barbecues, and this dish became a staple, cherished for its refreshing taste and easy preparation. Its visual appeal and delightful flavor profile make it the perfect crowd-pleaser, often welcomed at potlucks and holiday feasts alike.
Ingredients
- 1 and 1/2 cups graham cracker crumbs: These golden-brown crumbs offer a perfect balance of crunch and sweetness, lending a delightful base to the dessert.
- 1/4 cup granulated sugar: The touch of sugar enhances the flavor and provides that just-right sweetness to complement the dessert’s richness.
- 1/2 cup unsalted butter, melted: The aromatic butter integrates all the crust ingredients seamlessly, creating a luscious texture that melts in your mouth.
- 16 ounces cream cheese, softened: Creamy and tangy, this ingredient is the heart of the filling—adding a rich base that contrasts beautifully with the sweet topping.
- 1 cup powdered sugar: This fine sugar is key to achieving a smooth and pleasant sweetness without any graininess in your filling.
- 1 and 1/2 teaspoons vanilla extract: The fragrant, warm notes of vanilla elevate the dessert’s flavor, enhancing the creamy layer with comforting undertones.
- 1 cup heavy whipping cream: When whipped to perfection, it brings a light, airy texture that makes each bite a soft and delightful experience.
- 1 can (21 ounces) cherry pie filling: Bright red and glistening, these cherries are the crowning glory—adding a burst of fruitiness that intrigues the palate.
Cooking Time & Tips For Vintage Cherries In the Snow
When it comes to preparing Vintage Cherries In the Snow, you have the option of a quick version, where you can whip it up in around 30 minutes, or a slow preparation that allows the flavors to meld overnight for even greater depth. Regardless of your choice, here are some practical tips for success:
- Chilling is Key: Make sure to refrigerate the dessert for at least 4 hours, preferably overnight, to allow the layers to set properly.
- Softening the Cream Cheese: Ensure your cream cheese is at room temperature for easy mixing—this achieves a smooth filling.
- Gentle Folding: When incorporating the whipped cream, fold gently to maintain its airiness, creating a light and fluffy texture.
Step-by-Step Directions
-
Prepare the Crust: Begin by mixing the graham cracker crumbs, granulated sugar, and melted butter in a medium bowl until everything is well combined. The mixture should resemble wet sand. Press this crumbly goodness into the bottom of a 9"x13" dish, creating an even base. Place it in the refrigerator to chill while you work on the next layer.
-
Make the Cream Cheese Filling: In a large bowl, beat the softened cream cheese until creamy and smooth. Gradually add in the powdered sugar and vanilla extract, beating until fully combined. The mixture should be velvety and delightful.
-
Whip the Cream: In a separate bowl, whip the heavy cream until stiff peaks form. Take a moment to savor the airy texture and sweet scent.
-
Combine the Mixtures: Carefully fold the whipped cream into the cream cheese mixture until everything is well blended and fluffy. It’s crucial to gently fold to keep the filling light.
-
Layer the Cream Mixture: With the crust chilled, spread the cream mixture evenly over the graham cracker base, using a spatula for smoothness.
-
Top with Cherry Filling: Spoon the cherry pie filling evenly over the cream layer, ensuring not to press or swirl it too much, as you want to maintain distinct layers.
-
Chill Before Serving: Cover the dish and refrigerate for at least 4 hours or, for best results, overnight.
-
Slice and Serve: When you’re ready, slice into the chilled dessert and serve it with a smile. Each slice reveals the beautiful layers of graham cracker, creamy filling, and cherry topping.
Serving Suggestions & Occasions
Vintage Cherries In the Snow is perfect for various occasions. Serve it at summer family barbecues, birthday parties, or holiday gatherings. Pair it with a light beverage like iced tea or lemonade to contrast the creaminess of the dessert. It’s also delightful after a hearty meal, providing a refreshing and satisfying end to your dining experience.
Common Mistakes For Vintage Cherries In the Snow
-
Crust Falling Apart: Ensure the graham cracker crumbs are well mixed with butter and sugar to ensure they hold together.
-
Overmixing Cream Cheese: Avoid overmixing the cream cheese mixture once the powdered sugar is added to prevent a grainy texture.
-
Skipping the Chilling Time: Don’t rush to serve! Proper chilling is essential for the layers to set and for the flavors to meld beautifully.
-
Forgetting to Soften Ingredients: Failing to allow the cream cheese to soften can lead to lumps in your filling, impacting the dessert’s texture.
Healthier Alternatives & Variations
If you’re looking for healthier options, consider using reduced-fat cream cheese or Greek yogurt to lighten the filling. For a gluten-free version, swap out standard graham crackers for gluten-free alternatives. Additionally, you can experiment with different fruit toppings like blueberries or strawberries for a fresh twist.
FAQs
-
Can I make this dessert ahead of time?
- Absolutely! It’s even better when made a day ahead as the flavors have time to blend.
-
Is there a substitute for heavy cream?
- Yes, you can use coconut cream or a non-dairy whipped topping for a lighter option.
-
What if I can’t find cherry pie filling?
- You can create a homemade cherry filling by cooking down fresh or frozen cherries with a bit of sugar and cornstarch.
-
Can I freeze Vintage Cherries In the Snow?
- Yes, it freezes well! Just ensure you wrap it tightly to avoid freezer burn.
-
Can I use a different type of crust?
- Of course! A cookie crust made from Oreos or a nut crust can add unique flavors to the dessert.
-
Is it necessary to use vanilla extract?
- While it enhances the flavor, you can omit it if you prefer a simpler taste.
Conclusion
This Vintage Cherries In the Snow recipe isn’t just a dessert; it’s a nostalgia-filled experience that brings people together. The creamy layers, the crunchy crust, and the sweet cherry topping make it impossible to resist. Don’t wait—grab your ingredients and recreate this delightful treat today! You’ll not only savor each bite but also create memories that will last a lifetime. Happy cooking!
PrintVintage Cherries In the Snow
- Total Time: 240 minutes
- Yield: 12 servings 1x
- Diet: Vegetarian
Description
A delightful frozen dessert that combines cream cheese, graham crackers, and cherry pie filling for a nostalgic treat.
Ingredients
- 1 and 1/2 cups graham cracker crumbs
- 1/4 cup granulated sugar
- 1/2 cup unsalted butter, melted
- 16 ounces cream cheese, softened
- 1 cup powdered sugar
- 1 and 1/2 teaspoons vanilla extract
- 1 cup heavy whipping cream
- 1 can (21 ounces) cherry pie filling
Instructions
- Prepare the Crust: Mix the graham cracker crumbs, granulated sugar, and melted butter in a medium bowl until well combined. Press into the bottom of a 9″x13″ dish and chill.
- Make the Cream Cheese Filling: Beat the softened cream cheese until creamy, then gradually add powdered sugar and vanilla extract, mixing until combined.
- Whip the Cream: In a separate bowl, whip the heavy cream until stiff peaks form.
- Combine the Mixtures: Fold the whipped cream into the cream cheese mixture gently until well blended.
- Layer the Cream Mixture: Spread the cream mixture evenly over the chilled graham cracker crust.
- Top with Cherry Filling: Spoon cherry pie filling over the cream layer carefully.
- Chill Before Serving: Cover and refrigerate for at least 4 hours or overnight.
- Slice and Serve: Slice the chilled dessert and serve cold.
Notes
For a lighter option, use reduced-fat cream cheese or Greek yogurt. It can be made ahead of time for the best flavor.
- Prep Time: 30 minutes
- Cook Time: 0 minutes
- Category: Dessert
- Method: Chilling
- Cuisine: American
Nutrition
- Serving Size: 1 serving
- Calories: 300
- Sugar: 23g
- Sodium: 150mg
- Fat: 20g
- Saturated Fat: 10g
- Unsaturated Fat: 9g
- Trans Fat: 0g
- Carbohydrates: 26g
- Fiber: 1g
- Protein: 4g
- Cholesterol: 60mg