Apple Crisp: A Slice of Comfort in Every Bite
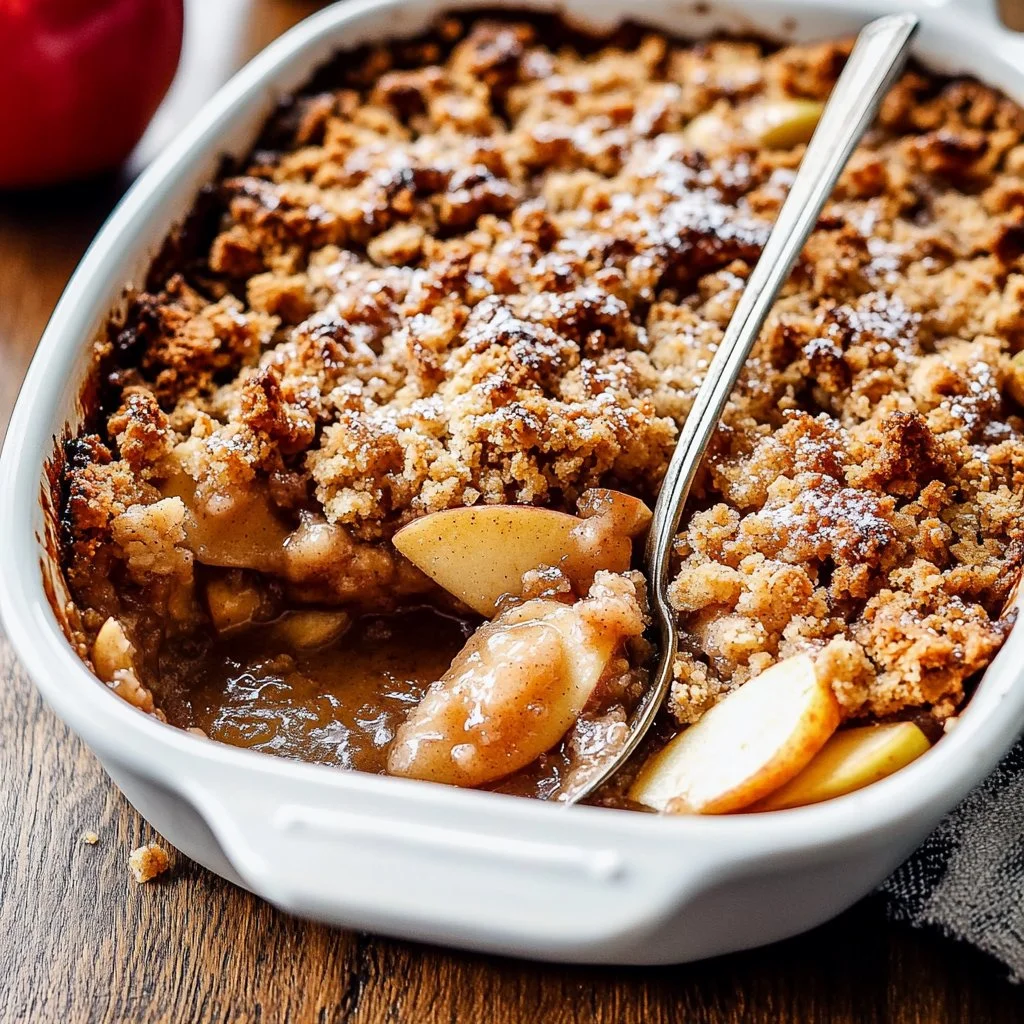
When autumn whispers through the leaves, there’s nothing quite like the aroma of freshly baked Apple Crisp wafting through your home. This dessert is a nostalgic hug on a chilly day, embodying a delightful blend of tender apples, warm spices, and a crispy, buttery topping that demands to be savored. Whether it’s enjoyed warm out of the oven or chilled the next day, Apple Crisp is a comforting treat that transcends generations. It’s fast, easy, and kid-friendly—perfect for weekend baking sessions with your little ones, or for cozy gatherings with family and friends. Let’s dive into why this classic recipe is just begging to be made in your kitchen today!
Are You Ready to Indulge in Pure Comfort?
Have you ever craved a dessert that can transport you back to childhood, filling your heart with sweetness and warmth? Imagine scooping a spoonful of warm apple filling, glistening and bubbling, topped with a crunchy, caramelized oat layer, and maybe a scoop of velvety vanilla ice cream sliding down the side. Doesn’t that just make your taste buds tingle? What are your favorite cozy memories associated with desserts like this?
Why You’ll Love This Recipe
This Apple Crisp recipe isn’t just about satisfying your sweet tooth; it’s about bringing joy into your kitchen and comfort to your table. Here are just a few reasons you’ll adore this dessert:
- Easy Prep: With minimal ingredients and straightforward directions, even novice bakers can whip this up without stress.
- Crowd-Pleaser: Perfect for family dinners, holiday gatherings, and potlucks, Apple Crisp delights people of all ages.
- Minimal Ingredients: You don’t need a long grocery list to create this delicious, comforting treat—most items are simple pantry staples.
- Versatile: Serve it warm, chilled, or however you like with countless topping options, each bringing a unique spin to the classic.
Ingredients
Creating the perfect Apple Crisp is all about combining the right ingredients to achieve that irresistible texture and flavor. Here’s what you’ll need:
- 8 medium apples (peeled and cut into 1-inch chunks)
- 1/2 cup packed light or dark brown sugar
- 1/4 cup all-purpose flour
- 1 teaspoon pure vanilla extract
- 1 teaspoon ground cinnamon
- 1/2 teaspoon ground nutmeg
- 1/4 teaspoon salt
- 3/4 cup all-purpose flour (for topping)
- 3/4 cup packed light or dark brown sugar (for topping)
- 1 teaspoon ground cinnamon (for topping)
- 1/2 cup unsalted butter (cold and cubed)
- 1 cup old-fashioned whole rolled oats
- Optional: Salted caramel and vanilla ice cream for serving
The combination of juicy, tart apples mixed with sweet, warm spices creates a mouthwatering filling, while the topping adds a crunchy, buttery contrast you won’t be able to resist.
Timing: Fast Indulgence Meets Cozy Luxury
In just about an hour, you can transform your kitchen into a sweet escape. The prep time is a quick 15 minutes, and before you know it, your Apple Crisp will be in the oven, baking to perfection for 45 minutes. Just imagine the anticipation as you wait for that timer to go off, the smell of cinnamon inviting you to lean into the deliciousness that’s almost ready to be devoured.
But if you truly want to take the luxurious route, allow the Apple Crisp to cool before serving. This helps the flavors meld perfectly and gives you those gooey, drippy apples that are absolute heaven.
Step-by-Step Instructions
Ready to create this mouthwatering dessert? Here’s how to make a classic Apple Crisp step-by-step:
-
Preheat your oven to 350 degrees F. Lightly grease a 9×13 inch baking pan, prepping for all that wonderful goodness.
-
Mix all the filling ingredients together in a large bowl. The fragrant blend of cinnamon and nutmeg should already tempt your senses.
-
Make the topping: In a medium bowl, whisk flour, brown sugar, and cinnamon together. Cut in the cold, cubed butter using a pastry cutter or fork until the mixture becomes crumbly. Stir in the oats until evenly combined.
-
Spread the apple filling into the prepared baking pan, then sprinkle the crunchy topping over the filling. Make sure to cover all the fruit so each bite is filled with sweet, buttery crunch.
-
Bake for 45 minutes or until the topping is golden brown and the fruit juices are bubbling alongside the edges of the pan, making your mouth water in anticipation.
-
Remove from the oven, place on a wire rack, and allow to cool for at least 5 minutes before diving in. Serve it warm, at room temperature, or cold, with a drizzle of salted caramel or a scoop of vanilla ice cream for that extra indulgence.
Every bite of this crisp leaves behind a trail of cinnamon-spiced warmth that will have your friends and family begging for seconds—and maybe even thirds!
Nutritional Information
Per serving, this heavenly Apple Crisp has about 300 calories. While it’s a sweet indulgence, remember that it’s perfectly acceptable to treat yourself once in a while! The apples lend a host of nutrients, and let’s be real—when it comes to desserts, happiness is hard to quantify.
Healthier Alternatives
Looking to tweak this classic recipe for a healthier twist? Here are some options:
- Low-Sugar: Swap out granulated sugar or brown sugar for a stevia or monk fruit sweetener.
- Dairy-Free: Substitute the unsalted butter with coconut oil or a vegan butter alternative.
- Gluten-Free: Use gluten-free flour and certified gluten-free oats for a recipe that everyone can enjoy.
These changes can help make this delicious dessert healthier while still maintaining those crave-worthy flavors!
Serving Suggestions
Imagine gathering around the table during the holidays, your Apple Crisp glowing beautifully in the center. Picture the laughter with your family or friends, as the crumble fills the air with sweetness. It pairs perfectly with a scoop of vanilla ice cream melting into the warm apple filling.
If you prefer it with salted caramel, drizzle this over each serving to bring a luscious depth of flavor that perfectly balances the tartness of the apples. Perfect for birthdays, Thanksgiving, or just a cozy night in, Apple Crisp is sure to impress.
Common Mistakes
Avoid these pitfalls to ensure your Apple Crisp is perfection:
- Overbaking: Watch the baking time closely. You want a golden-brown topping without burnt edges.
- Incorrect Texture: Ensure your apple chunks aren’t too big or too small; aim for about 1-inch chunks for even cooking.
- Messes: Line your baking pan with parchment paper for easy cleanup after all that delicious crispiness.
Storing Tips
Best enjoyed fresh, but if you have leftovers, store them covered in your fridge for up to 3 days. To reheat, simply warm in the oven at 350°F for about 10-15 minutes.
Feeling adventurous? You can freeze portions of the Apple Crisp! Just portion it into airtight containers or freezer bags. It should keep well for about 3 months. When you’re ready to enjoy, thaw overnight in the fridge and reheat as described above.
Tempting You to Bake it ASAP
There’s no time like the present to indulge in this delightful Apple Crisp that brings warmth and sweetness into your life. It’s easy to prepare, perfect for gatherings, and most importantly, it’s absolutely delicious! So grab those apples, gather your loved ones, and create memories that will keep everyone coming back for more.
FAQs
-
Can I use any type of apple for this recipe?
- Yes! Arrays like Granny Smith, Honeycrisp, or Fuji are perfect for their sweet and tart balance.
-
How can I prevent the apple filling from being too watery?
- Use a thickening agent like cornstarch or let the apples sit with sugar for a bit to draw out moisture before adding them to the mix.
-
Can I make Apple Crisp ahead of time?
- Absolutely! You can assemble it ahead and store it in the fridge. Just bake it fresh when you’re ready to enjoy.
-
Can I add nuts to the topping?
- Yes! Chopped pecans or walnuts can add a delightful crunch and nutty flavor.
-
What’s the best way to serve leftovers?
- Reheat in the oven or microwave and enjoy with a fresh scoop of ice cream for that delightful experience all over again!
Your Apple Crisp adventure awaits—immerse yourself in the comfort of this classic dessert and let every bite take you back to simpler times. Happy baking!
Print
Apple Crisp
- Total Time: 60 minutes
- Yield: 8 servings 1x
- Diet: Vegetarian
Description
A comforting Apple Crisp dessert with tender apples, warm spices, and a crispy, buttery topping, perfect for cozy gatherings.
Ingredients
- 8 medium apples (peeled and cut into 1-inch chunks)
- 1/2 cup packed light or dark brown sugar
- 1/4 cup all-purpose flour
- 1 teaspoon pure vanilla extract
- 1 teaspoon ground cinnamon
- 1/2 teaspoon ground nutmeg
- 1/4 teaspoon salt
- 3/4 cup all-purpose flour (for topping)
- 3/4 cup packed light or dark brown sugar (for topping)
- 1 teaspoon ground cinnamon (for topping)
- 1/2 cup unsalted butter (cold and cubed)
- 1 cup old-fashioned whole rolled oats
- Optional: Salted caramel and vanilla ice cream for serving
Instructions
- Preheat your oven to 350 degrees F. Lightly grease a 9×13 inch baking pan.
- Mix all the filling ingredients together in a large bowl.
- Make the topping: In a medium bowl, whisk flour, brown sugar, and cinnamon together. Cut in the cold, cubed butter until crumbly, then stir in the oats.
- Spread the apple filling into the prepared baking pan and sprinkle the topping over it.
- Bake for 45 minutes or until the topping is golden brown and the fruit juices are bubbling.
- Remove from the oven and cool for at least 5 minutes before serving.
Notes
Best served warm, at room temperature, or cold. Drizzle with salted caramel or serve with vanilla ice cream.
- Prep Time: 15 minutes
- Cook Time: 45 minutes
- Category: Dessert
- Method: Baking
- Cuisine: American
Nutrition
- Serving Size: 1 serving
- Calories: 300
- Sugar: 20g
- Sodium: 150mg
- Fat: 12g
- Saturated Fat: 7g
- Unsaturated Fat: 5g
- Trans Fat: 0g
- Carbohydrates: 41g
- Fiber: 3g
- Protein: 2g
- Cholesterol: 30mg